
1. Einleitung
• Die Herausforderung: Feinsteinzeug ist extrem dicht, hart und spröde, was saubere Schnitte ohne unschöne Ausbrüche an der Glasur oder Kante notorisch schwierig macht.
• Warum das wichtig ist: Saubere Schnitte sorgen für ein hochwertiges Finish, reduzieren den Materialabfall und senken zusätzliche Kosten für Ersatzfliesen.
• Überblick: Dieser Leitfaden beschreibt fünf praktische, in der Praxis erprobte Tipps, um mit Diamantscheiben glatte, ausbruchfreie Schnitte zu erzielen.
2. Tipp 1: Das richtige Diamantscheiben-Design wählen
• Segmentierte Trennscheiben vermeiden: Standardmäßige segmentierte Scheiben erzeugen starke mechanische Vibrationen, die Mikrorisse in der empfindlichen Glasurschicht von Feinsteinzeug verursachen.
• Die Lösung: Entscheiden Sie sich für Diamantscheiben mit geschlossenem Rand oder spezielle X-Mesh-Diamantscheiben, die speziell für das Schneiden von Fliesen und Marmor entwickelt wurden.
• Produktempfehlungen:
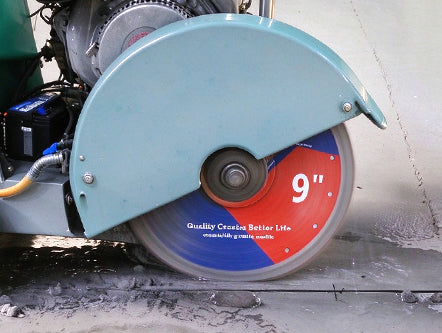
• Für präzises Fliesenschneiden und feine Kanten verwenden Sie eine BRSCHNITT Diamanttrennscheibe mit geschlossenem Rand, um ein glattes, vibrationsarmes Finish zu gewährleisten.
• Für härteres Feinsteinzeug, Granit oder Marmor wählen Sie eine BRSCHNITT Trocken- & Nass-Diamant-X-Mesh-Turboscheibe, die für eine verbesserte Wärmeabfuhr bei gleichzeitiger Minimierung der Schnittreibung entwickelt wurde.
3. Tipp 2: Für richtige Nasskühlung sorgen
• Gefahr durch Thermoschock: Das Schneiden von dichtem Feinsteinzeug erzeugt intensive Reibungshitze, die einen Thermoschock verursacht und zu plötzlicher Kantenbildung und Mikrorissen führt.
• Best Practices:
• Richten Sie während des Schneidens einen kontinuierlichen, gleichmäßigen Wasserstrahl auf die Kontaktstelle.
• Nassschneiden kühlt die Diamantmatrix und spült gleichzeitig abrasiven Schlamm weg, was ein Schleifen der Scheibe und Kantenabplatzungen verhindert.
4. Tipp 3: Vorschubgeschwindigkeit und Schnittdruck beherrschen
• Lassen Sie das Werkzeug arbeiten: Das gewaltsame Führen der Scheibe durch dichte Fliesen verursacht ein Verlaufen der Scheibe und Glasurabplatzungen.
• Richtlinien zur Technik:
• Üben Sie einen leichten bis mäßigen, gleichmäßigen Vorwärtsdruck aus und lassen Sie das Diamantkorn das Material auf natürliche Weise abtragen.
• Verlangsamen Sie den Vorschub deutlich, wenn die Scheibe die Austrittskante der Fliese erreicht, um zu verhindern, dass die letzte Ecke unter Spannung bricht.
5. Tipp 4: Die Glasurlinie zuerst anritzen (Zwei-Schnitt-Methode)
• Warum flache Schnitte funktionieren: Das Durchbrechen der Oberflächenspannung der oberen Glasur im Vorfeld verhindert tief sitzende Abplatzungen bei Schnitten über die volle Tiefe.
• Durchführung:
• 1. Schnitt (Anritzen): Führen Sie einen ersten, flachen Schnitt (ca. 1–2 mm tief) über die Oberfläche der Fliese aus, um die Glasur sauber zu durchtrennen.
• 2. Schnitt (Durchtrennen): Führen Sie den Schnitt über die volle Tiefe entlang der vorgeritzten Nut aus.
6. Tipp 5: Die Diamantscheibe abgerichtet und scharf halten
• Matrix-Glasierung verstehen: Kontinuierliches Schneiden führt zu Ablagerungen in der Diamantmatrix und einer Glasierung durch den Schlamm, wodurch die Scheibe stumpf oder glatt wird. Eine stumpfe Scheibe reibt am Material, anstatt zu schneiden, was zu schweren Abplatzungen führt.
• Wartungsschritt:
• Führen Sie ein paar Schnitte in einen Abrichtstein aus Siliziumkarbid oder einen hochabrasiven Block aus, um verbrauchtes Bindematerial zu entfernen und frisches, scharfes Diamantkorn freizulegen.
7. Wichtige Erkenntnisse & Vergleichstabelle
| Faktor | Empfohlene Vorgehensweise | Zu vermeidende Praxis |
| Scheibenwahl | Verwendung von BRSCHNITT-Scheiben mit geschlossenem Rand / X-Mesh-Scheiben | Verwendung grober, segmentierter Diamantscheiben |
| Kühlung | Nassschneiden mit kontinuierlichem Wasserfluss | Trockenschneiden von Feinsteinzeug über längere Zeit |
| Schnittmethode | Zwei-Schnitt-Methode (zuerst flaches Anritzen der Glasur) | Einzelner Schnitt mit starkem, erzwungenem Druck |
8. Häufig gestellte Fragen (FAQ)
F: Kann ich Feinsteinzeug trocken schneiden, ohne dass es ausbricht?
A: Obwohl es spezielle Trockenschnittscheiben gibt (wie die BRSCHNITT Trocken- & Nass-Diamantscheibenserie), bleibt das Nassschneiden der Goldstandard für Feinsteinzeug, um die Wärmeausdehnung zu kontrollieren und ausbruchfreie Kanten zu garantieren.
Q: Warum bricht die Ecke an der Austrittskante am Ende des Schnitts immer ab?
A: Das verbleibende Material verliert an struktureller Festigkeit, wenn Sie die Kante erreichen. Reduzieren Sie den gesamten Vorwärtsdruck während des letzten Zentimeters des Schnitts oder drehen Sie die Fliese um 180 Grad, um den letzten Zentimeter von der gegenüberliegenden Seite aus fertigzustellen.