
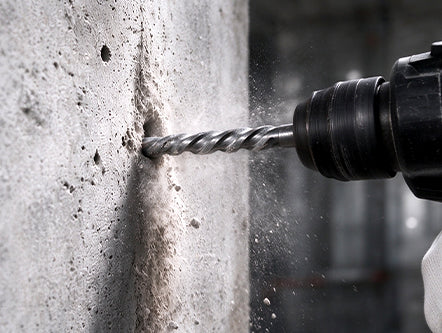
Das Bohren in Beton kann sich wie eine entmutigende Aufgabe anfühlen, aber mit den richtigen Werkzeugen und Techniken lässt es sich effizient und sauber erledigen. Hochleistungs-Diamantbohrkronen-Sets sind speziell dafür entwickelt, harte Materialien wie Beton, Granit und Feinsteinzeug präzise und mühelos zu durchdringen.
In dieser Anleitung führen wir Sie Schritt für Schritt durch den Prozess des Bohrens in Beton mit Diamant-Hohlbohrkronen und Frässtiften, damit Ihr Projekt von Anfang bis Ende ein voller Erfolg wird.
Schritt 1: Materialien & Sicherheitsausrüstung zusammenstellen
Stellen Sie vor Beginn sicher, dass Sie alle notwendigen Materialien und persönliche Schutzausrüstung (PSA) zur Hand haben:
• Diamantbohrkronen-Set: Stellen Sie sicher, dass Sie die richtige Gewinde- oder Schaftaufnahme haben (M14, 5/8"-11 Gewinde, 1/4" Sechskantschaft, Dreikantschaft, Rundschaft oder SDS-Adapter).
• Elektrowerkzeug: Kabelgebundene/kabellose Handbohrmaschine, Schlagschrauber oder Winkelschleifer.
• Kühlsystem: Wassersprühflasche oder eine kontinuierliche Wasserquelle (für das Nassbohren).
• Sicherheitsausrüstung: Schutzbrille, Staubschutzmaske, Gehörschutz und robuste Arbeitshandschuhe.
Schritt 2: Bohrstelle markieren
Markieren Sie mit einem Stift oder Bleistift deutlich die exakte Stelle, an der Sie bohren möchten. Überprüfen Sie Ihre Messungen sorgfältig, da Fehler auf Betonoberflächen schwer und kostspielig zu beheben sein können.
Schritt 3: Material sichern
Wenn Sie in eine nicht montierte Betonplatte oder einen Betonblock bohren, befestigen Sie diesen sicher mit Schraubzwingen auf einer stabilen Werkbank. Wenn Sie in eine Betonwand oder einen Boden bohren, stellen Sie sicher, dass Ihr Stand und Ihre Arbeitsplattform fest und frei von Hindernissen sind.
Schritt 4: Diamantbohrkrone anbringen
Setzen Sie den Schaft in Ihr Bohrfutter ein und ziehen Sie es fest, oder schrauben Sie den Bohrer direkt auf die Spindel Ihres Winkelschleifers (M14 oder 5/8"-11). Wenn Sie Bohrer mit Gewinde an einem Standard-Bohrfutter verwenden, bringen Sie den passenden Gewinde-auf-Sechskant-Adapter an.
Schritt 5: Sicherheitsausrüstung anlegen
Setzen Sie Ihre Schutzbrille auf, legen Sie die Staubschutzmaske an und setzen Sie den Gehörschutz auf. Beim Betonbohren entstehen feiner Quarzstaub und Schutt, daher sind eine gute Belüftung und Sicherheitsausrüstung unerlässlich.
Schritt 6: Mit der 45-Grad-Technik anbohren
• Abrutschen verhindern: Vermeiden Sie es, die Diamantbohrkrone sofort flach im 90-Grad-Winkel auf die glatte Betonoberfläche zu setzen, da sie sonst hüpfen und das Material zerkratzen kann.
• Einkerbung erstellen: Halten Sie die Bohrmaschine in einem 45-Grad-Winkel zur Oberfläche, um eine kleine, halbmondförmige Startkerbe zu erzeugen.
• Aufrichten: Sobald die Nut etabliert ist, neigen Sie den Bohrer langsam in eine aufrechte, senkrechte 90-Grad-Position. Üben Sie stetigen, mäßigen Druck aus—lassen Sie die synthetischen Diamantkörner das Material natürlich abschleifen, ohne das Werkzeug zu erzwingen.
Schritt 7: Bohrer kühl halten (Entscheidender Schritt)
Übermäßige Reibungshitze ist die Hauptursache für vorzeitigen Diamantverlust und Werkzeugversagen. Sprühen Sie kontinuierlich einen gleichmäßigen Wasserstrahl aus einer Sprühflasche auf den Schnittbereich. Das Wasser schmiert die Schneidkante, bindet gefährlichen Staub und spült den Bohrschlamm für schnelleres Bohren weg.
Schritt 8: Sanfte kreisende Bewegung anwenden
Behalten Sie während des Bohrens eine leichte kreisende oder orbitale Bewegung bei. Diese sanfte Wackelbewegung unterstützt den Auswurf des Staubs aus dem tiefen Loch und verhindert, dass sich die Hohlbohrkrone im dichten Beton festfrisst.
Schritt 9: Loch fertigstellen & Kanten profilieren (Optional)
• Bohrer herausziehen: Sobald Sie die gewünschte Tiefe erreicht haben, lassen Sie den Druck nach und ziehen Sie den Bohrer bei laufender Maschine langsam gerade heraus.
• Vergrößern oder Anfasen: Wenn das Loch leicht vergrößert, neu geformt oder angefast werden muss, um Spannungsrisse zu vermeiden, wechseln Sie zu einem Diamant-Frässtift, um die Innenkanten mühelos seitlich zu schleifen und zu glätten.
Schritt 10: Reinigung & Werkzeugpflege
Wischen Sie Bohrschlamm und Rückstände von der Arbeitsfläche. Waschen und trocknen Sie Ihre Diamantbohrkronen gründlich, bevor Sie sie in einem trockenen Koffer aufbewahren, um Korrosion zu vermeiden und sie für zukünftige Projekte einsatzbereit zu halten.
Fehlerbehebung & Kurzanleitung zur Auswahl
| Häufiges Problem | Hauptursache | Professionelle Lösung |
| Bohrer überhitzt oder schneidet nicht mehr | Übermäßiger Druck / Keine Wasserkühlung | Druck reduzieren; kontinuierlich Wasser sprühen. |
| Bohrer rutscht auf der Betonoberfläche ab | Direktes Ansetzen bei 90° | Im 45°-Winkel ansetzen, um zuerst eine Führungsnut zu erzeugen. |
| Lochgröße ist etwas zu klein | Bohrertoleranzen oder dickwandige Rohre | Diamant-Frässtift zum seitlichen Schleifen und Erweitern verwenden. |
Professionelle Werkzeugempfehlungen
Rüsten Sie Ihren Werkzeugkasten mit anwendungsbereiten Diamantlösungen von BRSCHNITT aus:
Komplettes Bohr- & Profilier-Set: BRSCHNITT Diamantbohrkronen- & Frässtift-Set — Enthält Hohlbohrkronen in verschiedenen Größen und Frässtifte.